Skip to content


Why Green Home Brewing

IMG_3964
Posted on June 7, 2011 by halzpal

Green home brewing?

I have brewed beer since the very early 1990’s and I love the hobby dearly, but a couple years back, I nearly gave it up. The soaring price of propane nearly drove me away. This series of posts is the direct result of my decision to keep brewing but to try it differently.

I mean “green” in a two senses, both related to that decision. Most obvious today, green means a focus on our environment. Home brewing should fit into our Big Picture, however we define it. I want home brewing to be a sensible and sustainable hobby for a long time, after we run out of cheap oil, after industrialized agriculture, maybe even after refrigeration. In the distant future, maybe all beer will be “warm and flat” like British ale. That sense of green is the Long Haul, abstract, maybe ultimately spiritual.

But the other sense of green is as close as the cash in my wallet. I started brewing when I was a college student. I had taste for expensive imported beer but wasn’t interested in paying top dollar for it. Looking back, I’ve probably been interested in good, cheap beer all along. Bad beer is never a bargain. I was angered by the cost of the propane as much as its impact on my carbon footprint.

Green home brewing is economically AND ecologically smart.

I started brewing in the days before the internet, when the only reliable wisdom came from Papa Papazian’s little book. No longer must we wait for a book to be published on a specific brewing topic — though there are a staggering number of books out there on so many different facets of brewing. These posts will document my investigations and adventures with green home brewing. Hope you come along for the ride.

Posted in • Green Home Brewing.

Tagged with , , .


Dead Robin Rocket Baltic Porter (12C)

Posted on June 24, 2012 by halzpal

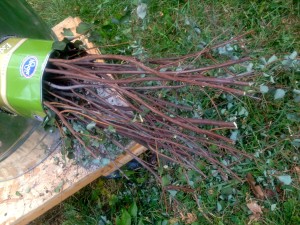
Spirea

It’s officially summer so I trimmed the spirea bushes around the front porch, in hopes of clearing a little most working space to renovate our grand old outdoor sitting space later in July. When I saw those heaps of brush, I thought the same thing you probably did: beer.

Those twigs are just the perfect size fuel for the “Hundred Dollar Folly,” the nickname I gave my rocket stove. I’m still don’t quite believe how well it worked for the first batch, how little fuel it used, how relatively easy it was to operate. I wanted to test how far it would perform. This batch I wanted to see how well it would work with rather green twigs.

Zymurgy Recipe Challenge: Zymurgy is a fantastic recource of kitchen tested beer recipes but one I hardly ever use. I challenged myself this day forward to brew one beer from each issue. The most recent Zymurgy (Vol 35 No. 4) focused on “Hop Bliss” hence half of the 14 recipes were that style. I steered away from them because I wore out my affection for ultra hoppy beers during my first few years as a home-brewer (back during the Clinton administration if you need to put a date on it.) Plus, it’s my suspicion that the rocket stove gets so hot on the bottom that it’s hard to avoid carmelization, hence compromising the “pale” in Pale Ale. I selected the “Three Kings Baltic Porter” a winning recipe back at the NHC in 2010… though the ingredients I finally used bear only passing resemblance to the original recipe. The magazine printed the extract version so I went to the Brewopedia to retrieve the all-grain version. Since you can get the real McCoy there, I am just printing the recipe I used, a kitchen-sink version which I named “Dead Robin Rocket Baltic Porter”:

Ingredients:
13 # Maris Otter pale malt ( my base grain of choice)
.85 Munich malt
1 # chocolate malt
.5 # 120 L crystal
.25# Carapils / Dextrin malt
2 oz Saaz (60 min)
1 oz Hallertau (60 min)
1 oz Hallertau (10 min)
Munich dry wheat yeast

Story Time: “Dead Robin?” On brewday, I discovered not one but two dead robins around our property. I felt slightly guilty since earlier in the week I’d been cursing them as they plucked the worms from our garden bed. Dead robins, this one’s for you.

We got a dinner invitation from my long time brewing buddy right about the time I got all the grain and water safely nestled in the insulated mash tun. I figured that it wouldn’t go anywhere and that I could postpone brew day until Sunday. This morning I tasted the runnings and detected no sense of souring, though if this ferments down, it will be mighty powerful.

The other trouble was with yeast. I wanted to use the yeast indicated in the recipe so I bought a tube of it, gently warmed it to room temp in my hands to wake it up and pitched it into a cup of malt extract. I waited for nearly 20 hours with absolutely no sign of life. Finally, as the brew neared completion, I ripped open a package of dry yeast and sprinkled it on the starter concoction. Within ten minutes, there was active fermentation. Another brewday saved by dry yeast. I will not waste my money further on “live” yeast.

RocketIntake
Fuel Input to Rocket Stove

For kindling, I grabbed some handplane shavings from a finger joint box I’m making. Oddly enough, the spirea twigs didn’t want to catch. Could it be because they were so green the leaves were still supple? I wasted a dozen matches before I tried getting the blaze going with dry sticks and only then adding the spirea twigs. Note to self: dry wood burns; green wood smokes. Of course once I got the rocket stove up to temperature, the twigs were nearly vaporizing into clean combustion.

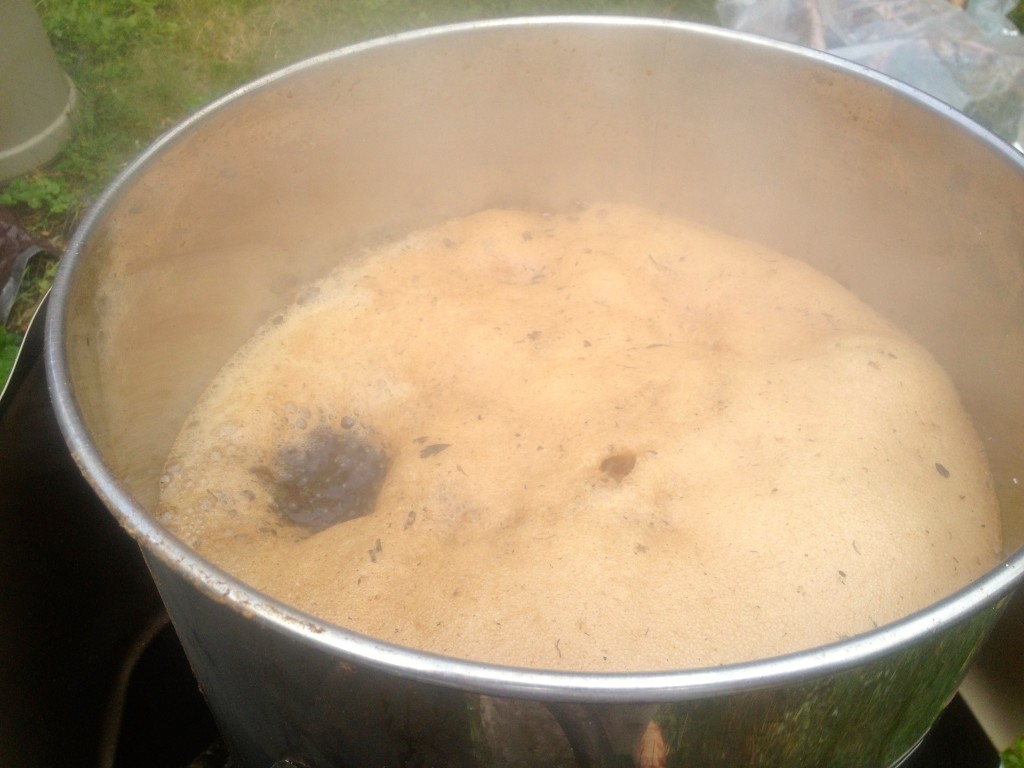
BoilOver

One trouble of brewing over an always-on heat source is the risk of boil-over. As my batch reached boiling temp in what seemed like record time. I snapped photos as the bubbles churned up to the top of the pot… and went over! Note to self: one way to turn down the heat on a rocket stove is to grab the twigs sticking out of the hopper, and pull them out a few inches. The fuel in the combustion chamber will continue to burn for a mintue so the change isn’t immediate but gradually the heat will lower. I played with this technique throughout the boil and got it to boil over again and then tamed it back to normal. Note to self: boiling hot wort smarts.

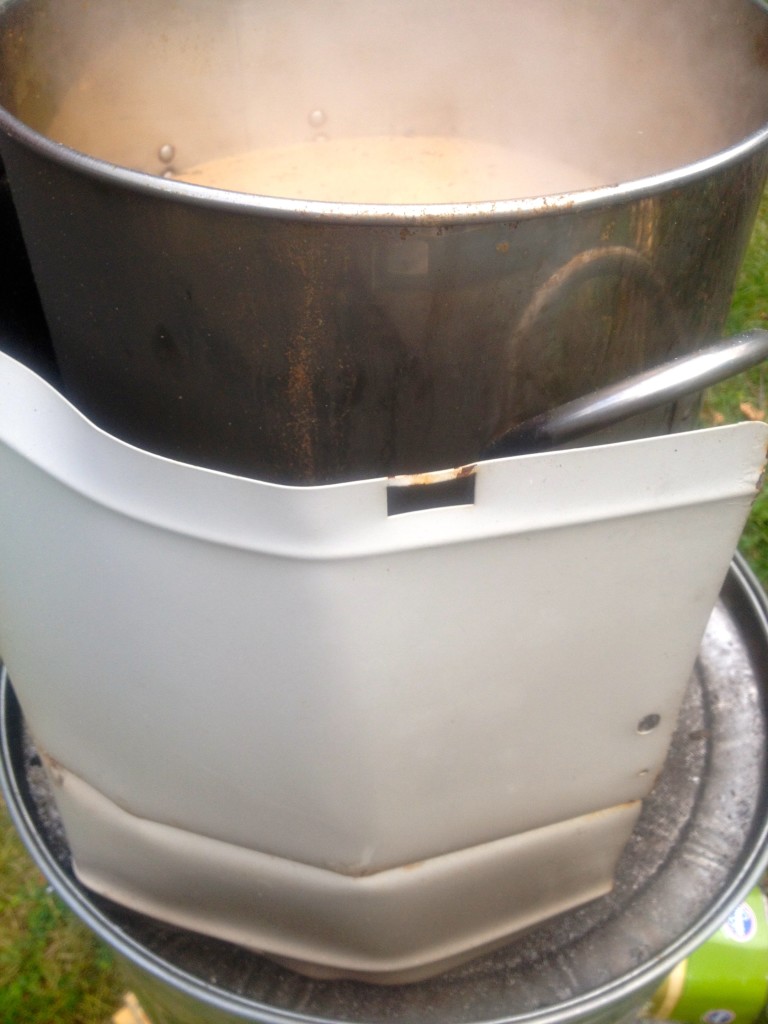
HeatSheild

I made a few adjustments to the heat shield. It still needs a bit of focused work to make it fit but it definitely keeps the heat around the pot. I noticed a fair amount of soot, likely from the green twigs.
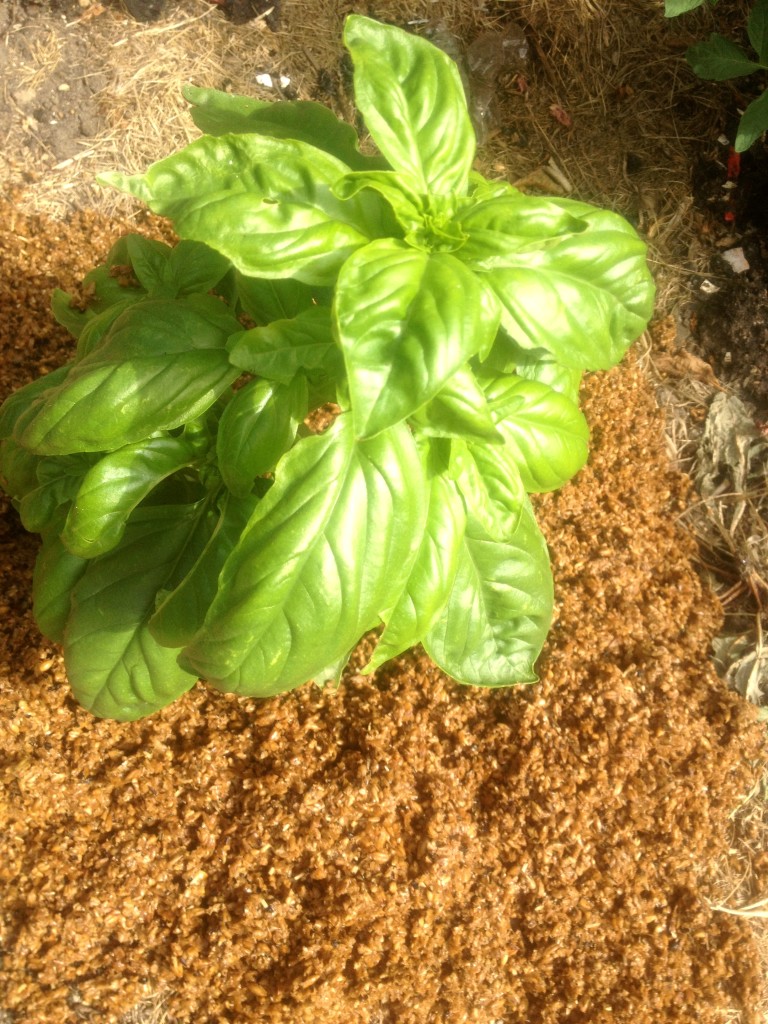
Brew day was over well before lunch time, mostly due to mashing overnight in the insulated tun. The entire boil used the brush from one of the spirea bushes, leaving me with enough fuel for three more boils. I ladled out the spent grains around the basil as a rather attractive mulch.

Brewing Grains as Garden Mulch

Brewing Grains as Garden Mulch

Posted in • Green Home Brewing.

Tagged with , , , , .


Ice Distillation — A New Use for Old Beer

Make Ice (Beer) when the Snow Flies

Make Ice (Beer) when the Snow Flies

The cold weather equivalent of “Make Hay While the Sun Shines” might very well be “Make Ice While the Winter Rages” and this is a sentiment a buddy of mine takes to his brew-house. When it’s cold, especially the Polar Vortex kind of cold we’ve been enjoying recently, he makes “Ice Beer,” or more specifically, he distills his concoctions using the fun fact that water and alcohol freeze at different temperatures.

Before going farther, I gotta level with y’all that the way I read the law, this process, ice distillation, is as illegal as traditional distillation for the home-brewer. I am presenting this technique mostly for its gosh-darned ingenuity, rather than encouraging its adoption. Legal hassles are NOT an effect way to spend one’s pennies and so can not be endorsed by greenhomebrewing. Jus’ sayn’.

Freeze distillation is the magical process whereby, say, hard apple cider transforms to apple jack. If one used traditional evaporative distillation, hard cider turns into brandy. The difference is important. With my buddy’s freezing set up, only the water is removed thus concentrating anything that can be dissolved in alcohol. You’ll end up drinking what’s left in the pot. Brandy is aristocratic; jack is a bit more gritty.

His set-up is stupid-simple which is great because the day I inspected it, the wind-chill was double-digits below zero. He started with a large stainless steel pot that he washed clean. No need to sanitize, he reasons, when working with temps that low and higher alcohol concentrations. This pot absolutely MUST have a lid, he warned. Then he poured into this 10-gallon pot the dregs of several beers. For this winter’s attempt, he was combining the bits of several different IPAs that had languished on the bottom of kegs. They were taking up space in his kegerator and he figured that they likely had a high alcohol content to counteract the hops. Cover the pot and leave it overnight.
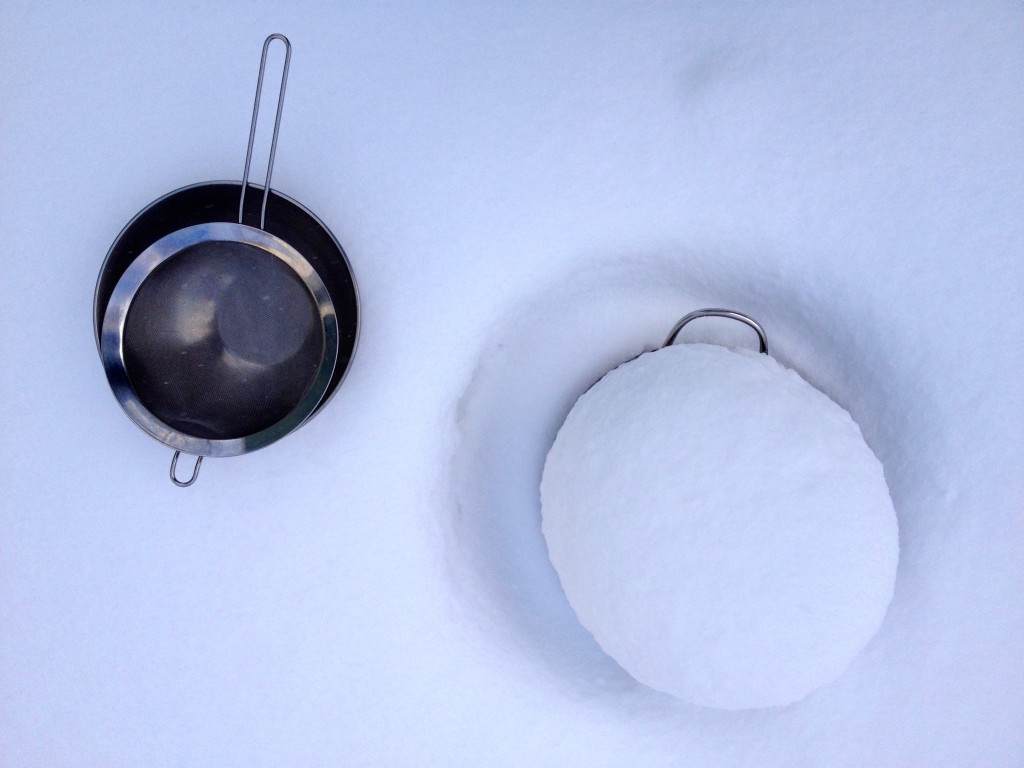
Tools of the Trade

Tools of the Trade

Snow had mounded over the top of the lid on the morning I accompanied him. He carried a fine sieve and a metal bowl and I held the lid while he strained out the frozen water. I gotta say the ice was rather interesting, forming irregular flakes rather than a solid chunk, a phenomenon called slip ice. He saved the ice flakes in the metal bowl because at this point in the process, he explained, they probably are more like a beer slushy than pure frozen water. The straining was mercifully quick and we were back in his warm kitchen within minutes.
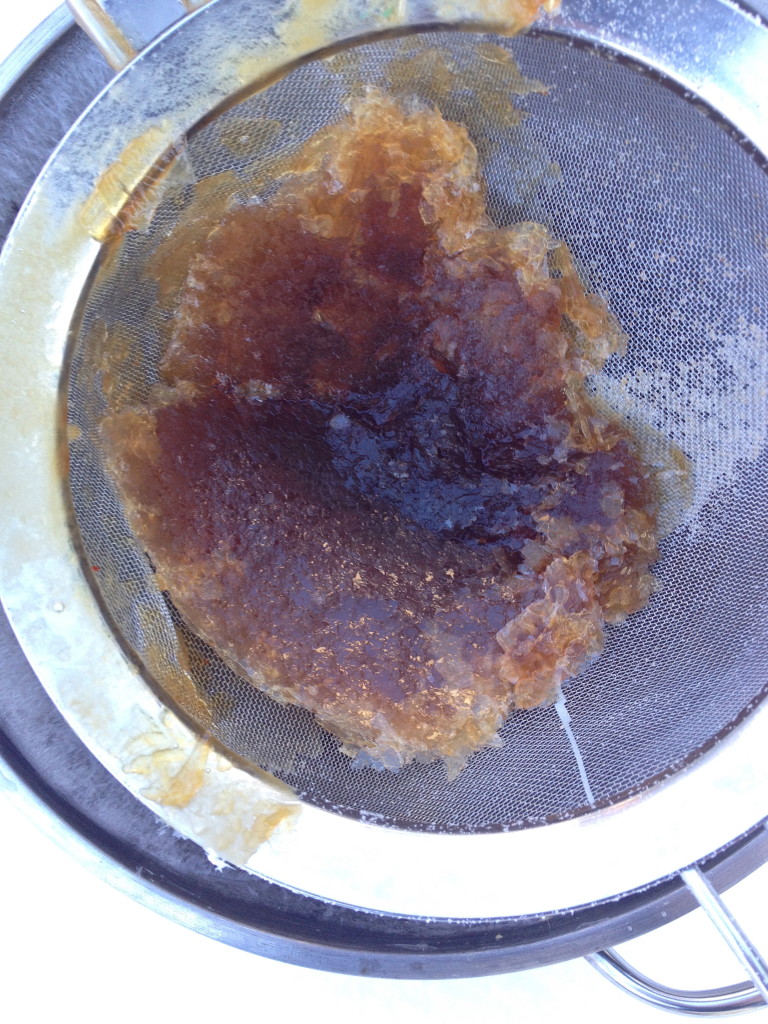
"Slip Ice" aka "Beer Slushy"

“Slip Ice” aka “Beer Slushy”

“That wasn’t a 10-gallon pot,” I noted.

“I’ve already transferred it down,” he explained.

“Exactly how much water do you remove from this stuff?”

He grinned. My buddy grins whenever there’s a question he can’t answer.

He poured the beer slushy into a quart Mason jar, nearly filling it. I ran calculations, at a quart removed every day, how many days would it take to reduce 10 gallons to… whatever. If it didn’t bother him, it didn’t bother me.

My buddy cracked open some Apple Jack he bottled ten years ago and gave me a sample. It was crystal clear, the color of pale straw, and gave off the slightest aroma of apples. It was remarkably smooth on the tongue, dry with only a slightly harsh bite at the finish. And it was deceptively potent. “How strong is that stuff?” I asked at the bottom of my glass but he only grinned. I am a closet number-nerd, and I would have appreciated something quantifiable.

Once the slushy melted sufficiently, he poured me a taste. Sweet Merciful Falstaff, it was bitter! I once was a hop-head, back in the last millennium, and the search for two-fisted bitters drew me into home-brewing… but those days are past. My friend explained that at least one of the batches he used was marred by an over-abundance of Magnum in the mix. I suspect that the freeze distillation was rather enhancing the hop punch as well.

“That’s… ah, chewy,” I said, remembering hop tea.

He grinned.

“You think that will mellow out with age?” I had to ask.

My buddy grinned and shrugged, clearly unconcerned. “I’ll invite you back in ten years to give it a try.” He’s got a point though. Why not experiment, if it was beer he wasn’t drinking anyway and especially since it’s not costing anything to transform it–that is, until the revenuers haul his butt to jail.

As I trudged home through the Winter Wonderland that is Michigan in January, I turned the process over and over in my mind, trying to come up with something legal I could use it for. Desalinization, I suppose, if I wasn’t surrounded by the largest bodies of fresh water in the world. I’ll keep pondering and post whatever I come up with.

Posted in • Green Home Brewing.

Tagged with , , .


My First Rocket Stove: 3 Ways It Rocks + 3 Ways It Stinks

First posted on April 5, 2012 by halzpal

When I first heard of a “Rocket Stove” my first thought was “I wonder if I could brew on that?” There are models designed especially to cook five gallons which seemed close enough to a soda-keg sized batch of beer. I built one last winter and here’s how it went.

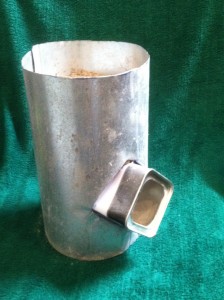
IMG_2784

My Discarded Rocket Stove

Three things are to be noted as wonderful:

• It’s Finished! — I actually completed the thing — To often, I fear, my great ideas stay ideas. It’s wonderful to refine the concept but at some point, you’ve got to start tinkering with some actual atoms. Kudos to me for actually making the thing.

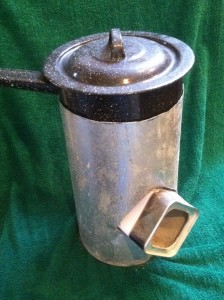
• Behold the Pot Skirt — I integrated a “pot skirt” into the design. A pot skirt directs the heat of the stove around the outside of the cook pot. It also minimizes the effect of wind. Since I was building the rocket stove out of metal (more on that in the second half) instead of cans, I had the flexibility to extend the upper edge of the stove high enough above the rocket exhaust that it could be a pot skirt.

IMG_2786

Sauce Pan Fits the Pot Skirt Perfectly

• Note the Feed Tube — I used a rectagular can for the feed tube. The feed tube accomplishes two tasks: it allows an upper area through which fuel can be fed to the combustion chamber and it also allows a lower area where air can be drawn in and pre-warmed. This clear input for combustion air is one of the key features that distinguishes a “rocket stove” from a mere “camp stove.” The presence of so much oxygen, I gather, also allows the fuel to combust more completely leaving so little ash and char at the end of the burn.
What’s with the square? I inserted the can on a 45 egree angle so it was more like a diamond than a square. This allowed another piece of metal to rest diagonally across the square to separate the fuel and air inputs. The angles of the square, I figured would support the center divider a bit better than on other designs where a round can was used for the input tube.

And yet, as gloreous as this my first rocket stove is, I’ll never fire it. Why?

• Smells like Metal — Most damning is that in my enthusisam I made the body out of a length of heating duct material. A great source of cheap sheet metal that I was able to scavenge… and yet it’s galvanized metal. Galvanized metal shouldn’t be heated to the temperatures found in a stove because it releases fumes that are poisonous. And furthermore, I’ve been told they don’t improve the flavor of the beer (grin)

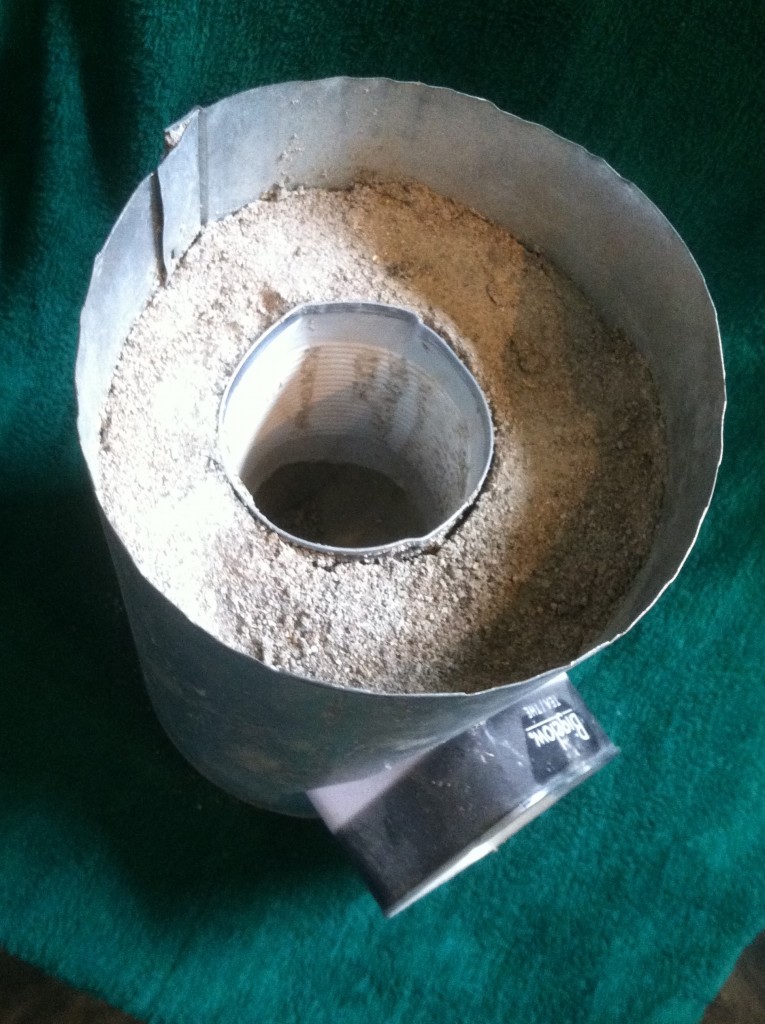
• Wrong Vermiculite — I used the wrong kind of vermiculite. I used vermiculite from the gardening center which is extremely fine. I should probably looked a bit further for the kind used for insulation since the granules tend to be much larger. I also wasn’t too pleased with the consistency of the cement / vermiculite mixture. Many rocket stove builders mention that an ideal blend requires a degree of fiddling. I needed to add LOTS more water, for instance

IMG_2785

What a Small Combustion Chamber, eh?

• It’s too small — Once I got the thing assembled, I realized that it’s probably too small to boil 5 gallons of water on, at least, not in any tolerable amount of time. The fuel input tube needs to be bigger, I figure, to allow more fuel to combust at the same time… which also means that the combustion chamber should be a touch bigger… and who was I kidding with that pot skirt that was sized for a sauce pan? Can’t make beer in that!

I am very happy with my first draft rocket stove, even though I’ll be breaking it up for scrap this afternoon without firing it even once. It gave me a chance to fiddle with the materials and to remember how to work with tin snips.

And best of all, I can now call myself a “Rocket (Stove) Scientist!”
Posted in Process | Tagged boil, heat, stove, tinkering | Comments Off

Posted in • Green Home Brewing.

Tagged with , , .


5 Reasons Why We Go to Maker Faire

Maker Works Soapbox Derby Race Track

Maker Works Soapbox Derby Race Track- click for larger view!

Sunday afternoon found us in a bright and bustling lot adjacent to the Henry Ford admiring home-made props, learning about alternative energy and currency, throwing darts, betting on wooden derby cars, and conversing with makers from across the country. The 5th Maker Faire Detroit welcomed thousands of people to a place filled with imagination and innovation, and we felt right at home.

Why do we go to the Maker Faire every year? We certainly had a great time last year, but why go more than once? As at other events, there’s a number of booths and groups who come to the Maker Faire each year, and not everything on display is brand new ideas or merchandise. Nonetheless, we have made a point of attending the Maker Faire each year, and we will almost certainly go next year.

Here’s why:

Innovation: Can you make it faster, better, cheaper — or at home? One of the coolest things I saw was a wheelchair modified with a lift to aid the user in standing up. A teenager from Ohio had built the equipment with parts from a hardware store for about $400, compared to the $4000 and up specialized chairs on the market.

Dalek Bowie

Imagination: The Maker Movement is full of people using their imaginations to make what they want. We saw a Dalek Bowie mash-up costume that a young woman had handcrafted and was happily showing off.

Creativity: Endless amounts of this on display! One of our favorites this year was the Maker Works display. Their whole tent was devoted to a single feature: making and racing a soapbox derby car, from woodblock to the finish line. We watched people of all ages sketching their designs, waiting for them to be cut on a saw, and adding wheels and extra features from the stash of recycled parts provided by the Scrap Box. The joy on the faces and the buzz of excitement in that tent was obvious.

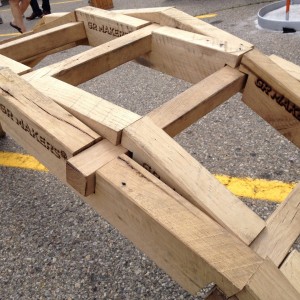
A sturdy DaVinci Bridge made of 2 x 4's

A sturdy DaVinci Bridge made of 2 x 4’s

Building a DaVinci Bridge

Building a DaVinci Bridge

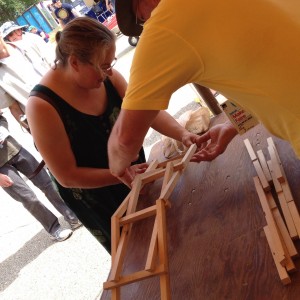
Conversation: We had a lot of good conversations on Sunday. Many of them began with that ever-popular conversation starter– paying serious attention to someone’s work. Jim is a master of conveying engagement in art or craft that captures his interest. When you take the time to examine an object or idea that another person has crafted, you are giving that person a gift which he or she shouldn’t take lightly. We also learned all day because we asked a lot of questions. I learned how to assemble a DaVinci bridge with the aid of a helpful volunteer.

Inspiration: Having an enjoyable outing is always a plus, but Maker Faire is an event that inspires attendees to go out and do something. I left with a stash of ideas to try at home.

What if you lack workspace, or tools, or skill? We were excited by the number of makerspaces from near and far that represented at the Maker Faire. I’m sure we didn’t see them all, but some of the local groups included Maker Works (Ann Arbor), All Hands Active (Ann Arbor), GR Makers (Grand Rapids), Mt Elliot Makerspace (Detroit), i3 Detroit (Ferndale), and TechShop (Allen Park). Each of these places offers tools, training, space and camaraderie, so you don’t have to wait to make something exciting.

See you next year at the Maker Faire!

Posted in • Making.

Tagged with , , , , .