Skip to content


Finding Delight in Variations in Gardening

You don’t have to be a gardener to have noticed that the weather this summer has been “different” from usual. An early warm spell, followed by a hard frost, a fairly nice spring, an extremely dry hot summer, and now late summer, which hasn’t achieved its identity yet. If you do grow any plants, however, you may have had a chance to reflect on how their growth has varied from patterns and expectations of previous seasons.

The weird weather caused delayed fruition in two notable areas in our garden.

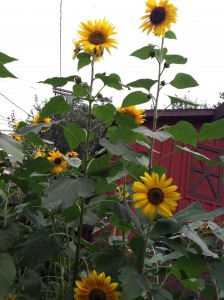
One oddity was our sunflowers. They grew very tall and still remained very tall green stalks until mid-August. The stalks were more than 8 feet tall before the first flower opened. Now they are as full and lush as usual, and the bees and insects are enjoying them as much as we are.

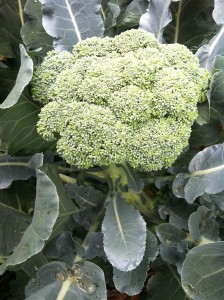
Likewise, our broccoli had me worried. I feared I would be writing an article titled “The Summer of Headless Broccoli” because the plants only had glorious leaves until late August. I was wondering if perhaps I (or the grower from whom I’d purchased the seedlings!) had mixed them up with collards– although the leaves were decidedly “blue” as our granddaughter noted. Usually we harvest the big center heads of the broccoli in July and the smaller side heads through the rest of the summer. This year, I’m just getting ready to harvest the first broccoli of the season.

There are too many variables to account for in attempting to explain my garden’s behavior. My own irregular watering habits, I’m sure, failed to meet the needs to some plants I grow. I may have planted different varieties than in previous summer; I didn’t check and I’m actually not sure how detailed some of the records are. It doesn’t take a botanist or horticulturalist to know that it’s been a strange summer. Just a little observation will tell us that.

As in all growing seasons, I’m learning in the garden. This has been a summer where I am made aware that I’m honing my gardening skills like tending and watering plants during adverse conditions as well as my “soft skills” like perseverance, flexibility, and powers of observation.

Where did you experience the biggest “variations” in the garden this summer so far?
Posted in • Growing.


First Tomatoes 2012

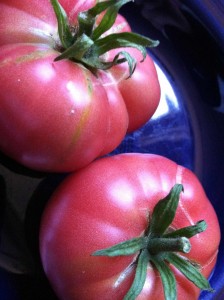
I could claim that everything else growing in the garden is a prelude, but that would be giving too much power to tomatoes. Nonetheless, the first tomatoes do mark the time where the garden is hitting its stride.

The first one I cut up and ate with salt still warm from the garden. Soon there will be tomato salads, salsa, spaghetti sauce, maybe some homemade ketchup, tomato soup and more.

For now, fresh homegrown tomatoes are a fantastic treat.

Posted in • Growing.

Tagged with , .


Gardener’s Brunch: Greens, Eggs — No Ham


This time of year is a turning point in the garden. The plants are not just pretty but, increasingly, a source for real food. Today we had a meal based on greens that came straight from the garden.

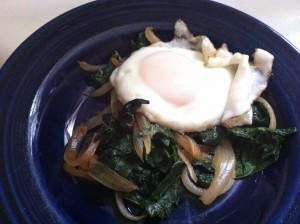
For a quick brunch, I cut up a large vidalia onion. I sautéed the onion in olive oil for a few minutes, and then put the lid to let the onion continue to steam in the pan while I gathered the greens.

When I headed out into the garden, I took along our well-loved salad spinner as a bowl to gather kale of various types as well as a few other greens. I prepared the greens as I harvested, taking out the central ribs of the kale and tearing them into medium-sized pieces. We are growing regular, curly, and dinosaur kale; they cook and taste pretty much the same so my harvesting pattern is to take a leaf or two from each plant. I also picked some broccoli rabe (or rapini), a plant that I like even if I’m not exactly sure what to do with it. Much of the broccoli rabe had gone to flower, but then I trimmed it back so we have continued to gather leaves. As well, I gathered up some lamb’s quarters, a wild green that we have become very fond of, that is easy to identify, plentiful, and rich in nutrients.

In the kitchen, I gave the greens a thorough rinse and a spin in the salad spinner. It’s not necessary or even a good idea to get them completely dry; a bit of moisture on the leaves helps with the cooking and steaming process.

With the pan hot again, add all of the greens at once. Initially, it looks like way too many greens, but they shrink as the cook so don’t be deceived. Stir to keep the greens moving and the heat distributed and so the greens do not stick. We like them firm but tender so cook until they are wilted but not mushy, about 5 minutes. I added a tablespoon of soy sauce at the end to season the greens. Put the lid on so the greens continue to cook while the eggs are prepared.

We like eggs sunny-side up with greens, but any pan-prepared egg would work as well.

Plate up the meal with greens on the bottom and top with eggs. Salt and pepper as desired.

In short order, we enjoyed our greens and eggs on the front porch– and didn’t miss the ham.

Posted in • Cooking.

Tagged with , , .


Make the most of herbs by harvesting and preserving

Herb gardens are a fun way to ease into gardening. Most herbs are undemanding and hardy; for the most part, herbs will grow in poor soil, do well in sun and partly sunny spots, and don’t mind the dry or hot weather that often comes our way. They are thrivers and survivors, often neglected because they are just too easy to get along with.

My experience with herbs is that, being so easy to plant and grow, they can be underappreciated. Sometimes herbs are planted, in part because they are “useful” plants, but then forgotten about and not put to any use.

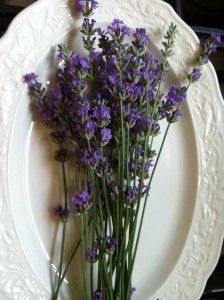
Take our lavender, for example. We have several healthy plants around the garden, and we have continued to add plants to our garden because we like lavender.

One minor triumph in a season of irregular (for many reasons) gardening is that I’ve have been harvesting lavender flowers. The best time to harvest lavender is before the buds open, and I usually remember that when the plants are in full bloom. I’ve done better than that this year. A half a dozen nice bundles of lavender are drying even as I write.

Harvesting herbs gives a gardener the chance to enjoy the benefits of the plants, but it also is good for the plants themselves. Many herbs such as thyme, oregano, and basil will get “bushier” following a trim or pruning and make for a second harvest later in the season. Most herbs are at their peak just before flowering, so it’s a good idea to pay attention to the plant’s life cycle.

The best time to harvest herbs is in the morning after the dew has dried but before the full sun is on the plant. Wash the stalks gently under cold water and dry on towels or paper towels.

Preserving herbs is a simple and straightforward process. Herbs can be dried by being hung in bunches tied with string. Put them in a dry, well-circulating area out of direct sunlight. Another method of drying herbs is placing them on cookie sheets in the oven on a low temperature of less than 180F for 2 to 4 hours.

Some people like drying herbs in the microwave. This isn’t a method I use, but it is supposed to work fine for small batches of herbs. Place a single layer of clean, dry leaves between two paper towels and microwave on high for 1 to 2 minutes. Let the leaves cool and test. If they are not brittle enough to crumble easily, microwave them for another 30 seconds.

Some herbs, like mint or basil, may darken if dried in sunlight. To avoid that problem, place clean, dried herbs inside a paper bag and hang in a well-ventilated area to dry. It works surprisingly well, and the paper bag makes collecting the leaves as you remove them much easier.

Herbs can also be frozen. Coarsely chop clean herbs and place them in a water-filled ice cube tray. Freeze solid and then place the herb ice cubes in freezer bags.

When drying herbs, make sure that the herbs are completely dry before storing in air-tight containers. I like to use pint jars or recycle herb jars or other small jars to store and enjoy my garden herbs all year long.

Posted in • Cooking.

Tagged with , , .


Plant an (almost) Instant Kitchen Garden this Weekend

Maybe this was the year you planned to have a vegetable garden. You’ve waited for the right weather and the perfect time. Perhaps some of life’s unpredictable events, like a new job or a cold even, have thrown off your schedule.

Here it is– the start of June already!– and you are wondering if there’s still time to plant anything.

The answer is an unequivocal Yes!

Here are some suggestions for planting an almost-instant kitchen garden.

1. Select and prepare your garden space.
Decide on a modest-sized space in the sunniest part of your yard. Set aside your inhibiting ambitions and scale back, if necessary, to a reasonable 3” x 3” section or perhaps 3” x 6”. If you can reclaim an existing but neglected bed, all the better.

Weed as thoroughly as you have patience to manage. The prep work you do is a worthwhile investment.

If I were starting a new gardening or revitalizing an old garden, I’d take the time to double-dig the soil. Explanation of that technique can be found here. There’s some disagreement whether double-digging is necessary, but I credit the work we did when we put in new garden beds almost 16 years ago with laying the groundwork (ha!) for our long-term soil improvement project.

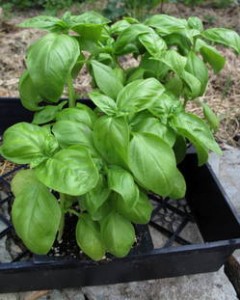
If this sounds like too much work, modify your plans again and think “Container Garden.” You can grow just about anything in containers, including tomatoes, peppers, and herbs. Gardening in containers also allows you to start with weed-free soil. It’s also a great idea if you have any concerns about soil contaminants.

2. Get your seedlings.
Yes, seeds are less expensive than seedlings. With planning, a gardener can discover an unbelievable variety, both locally and through catalogs.

But if we are talking about an instant garden, eschew seeds in favor of seedlings.

A wide selection of seedlings can be found at the Ann Arbor Farmers Market and other area farmers markets. Seedlings are also available at garden centers and many of the big box stores.

The key is to select healthy plants. Choose seedlings that are a healthy green and off a medium size. Avoid plants that are lanky, long, or thin. Skip the plants that are already flowering too. Avoid plants with yellowing leaves. Watch out for plants that are root-bound or pot-bound. Finally, inspect for pests like aphids or ants.

If you’re plants have been raised in a greenhouse — most have and you can also ask– you will need to harden them off. Hardening off plants means gradually exposing them to full sun so that they don’t get shocked and die off. You can put them outside in a partially shaded area or bring them inside for shorter periods each day.

One more note: households that receive SNAP EBT benefits (food stamps) can use those to buy seeds and plants which produce food for the household to eat.

3. Plant ASAP.
After you’ve hardened off your plants if need be, make a point of getting them planted as soon as you can.

Cool, overcast days –like the ones predicted for this weekend– are the best times for planting. Dig the holes a bit larger than the root of the plant.

Handle your plants carefully. Their tiny root systems are delicate. If the roots are tangled, you can carefully separate or “tickle” them to encourage them to spread out and grow.

Plant the seedling at the same depth of soil it had in the pot. The exception is tomatoes, which can be planted a bit deeper or even sideways to encourage rooting.

If you want to have a kitchen garden this summer, you stand a good chance for success if you get your plants into the ground within the next couple of weeks. Don’t let the thought of skipping “the big vegetable garden” deter you from growing something. A modest start is better than none. Whether it’s your first try ever or your first garden in years, growing some part of your food provides satisfaction as well as the freshest food possible. You may find yourself inspired to do even better next year.

Posted in • Growing.

Tagged with , .