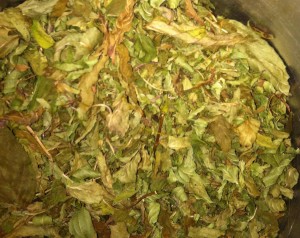
Dried home-grown mint
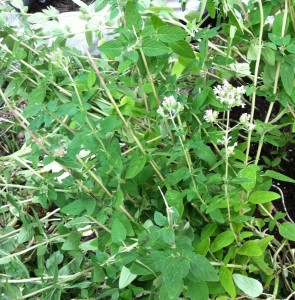
Years ago, before I had done a lot of gardening, I admired the large stand of mint growing in a friend’s garden. It was so bushy and fragrant and covered with little white flowers. She rolled her eyes and snorted. “I wish I never had planted it! It just keeps spreading!”
In my naivete, I was jealous. I wanted a gorgeous mint plant like that. I didn’t know at the time that mint is actually one of the easiest plants to grow ever.
Mint is also the toddler of the herb garden– maybe not the only one, but certainly one of the biggest. Like a toddler, mint will just not stay put where you want it. Mint cannot keep its hands — or in this case, its stolons (adventitious roots or runners) — to itself. Again, like a toddler, mint needs consistent attention. Trimming back mint is essential so that it doesn’t take over the garden.
Mint can be planted in pots so as to be restrained from indulging its spreading habits. We had some success with this technique a few years back. We planted several varieties of mint in large pots which we set out in the yard. Alas, we put the pots on the ground and the mint escaped into the beds and has continued to spread. Had we placed the pots on the porch or cement, we might have kept our mint contained.
We could tear up the mint, but like a toddler, mint also has some endearing qualities, so it’s worth taming rather than eradicating, in my opinion. A bed of mint always smells wonderful and especially when you are trimming it. Mint is also a very attractive and pretty plant. Bees and other pollinators love it. Finally, mint is terribly useful for both culinary, medicinal, and aromatic purposes.
Few things warm up a winter afternoon as pleasantly as a cup of mint tea. If you or someone you know grows mint, you can very easily harvest, dry, and brew your own tea, and there’s still time to begin the adventure this fall. Did I mention that mint is hardy? Episodes of frost may have wiped out the basil and tomatoes, but mint is still standing firm and proud in the garden.
To prepare herbs for drying, gather as much as you can. It will surely grow back. Work with a pair of garden shears or nippers and clip mint close to the ground.
There are three easy ways to dry mint. My favorite is the paper bag method. Gather stems into bunches and secure the stems with a string or rubber band. Place a bundle of mint in a paper bag and hang it in a dry area with good circulation. Mint should be dried out of the light or it will blacken, hence the paper bag will do that. (Basil is another herb that should be dried in the dark). The bag also makes gathering up the dried mint much easier.
Herbs can also be dried in an oven. Place a layer of leaves on cookie sheets in the oven on a low temperature of less than 180F for 2 to 4 hours. Or use the microwave to dry mint. Place a single layer of clean, dry leaves between two paper towels and microwave on high for 1 to 2 minutes. Let the leaves cool and test. If they are not brittle enough to crumble easily, microwave them for another 30 seconds.
To store, place crumbled mint leaves in an airtight container in a cool, dry, dark place.
We make simple mint tea all winter long. True tea aficionados may object to the terminology, but it works for us. We pack a 2 inch diameter tea ball with dried mint leaves and pour in boiling water to fill the pot. Let it steep for 3 or 4 minutes, and then enjoy a cup of homegrown mint tea.


