It’s too early to spill the beans, but some exciting changes are afoot at the 20 Minute Garden. We cannot wait to share the details– but we have to wait a bit longer.
Watch this space for further developments!
It’s too early to spill the beans, but some exciting changes are afoot at the 20 Minute Garden. We cannot wait to share the details– but we have to wait a bit longer.
Watch this space for further developments!
Posted in • Sitting Still.
Comments Off on Changes coming!
– August 1, 2013
 Around my last birthday, I figured I was finally old enough to attempt building something entirely with hand tools but I knew the project was doomed–my standard of taste far exceeds my standard of craft– so I made a deal with myself: Build a something that looked good at three feet. Any closer and I would be bound to see the flaws but if I could tolerate it a yard away, I could count the project a success.
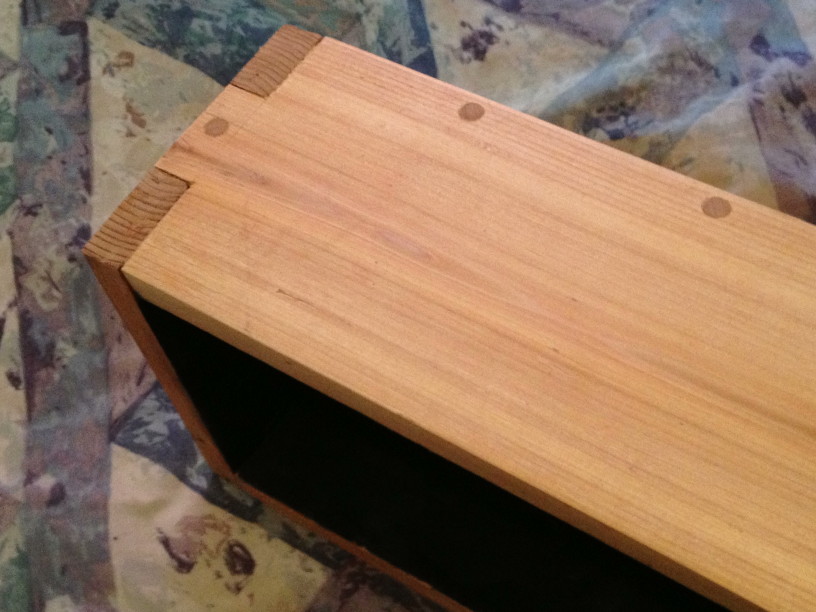
I chose a jointed box, something small enough I could tuck under the bed. Note especially that I didn’t NEED a box. This is not a practical project. I would have likely slapped one together with nails and butted joints if I actually had a use for one. This project was one of those endeavors where the process is as important as the final product. I just had to remind myself that, given my zealous beginner-level skills, what I came up with wouldn’t be very “Zen” to meditate upon at up close.
For wood, I used the cut-off cedar scraps from our barn. I selected pieces that, more or less, were knot-free. The planking was rough cut on one side and since I didn’t want a box of splinters, I hauled out one the handplanes I inherited from my father. I have one wooden hand plane from my grandfather that’s stamped with his name. I’ve tuned them up as best I could using resources I’ve found in books and on-line but I’ve never had an occasion to learn their use. As I dragged that old, dime-store quality tool across the board, chattering along until I adjusted the throat, I hoped my ancestors weren’t watching me too closely. I don’t have a proper bench for wood work, that is, it lacks dogs and hold fasts, so I clamped the board as best I could. It wasn’t ideal, but I wasn’t going for ideal.
 I “designed” the box around the wood I had, guided by my sense of proportion to end up with one 6″ deep, 8″ wide and 16″ long. It’s a compact size, easy to hold. The lid is a single board with hand cut and chiseled rabbets that allow it to seat into the box. The sole bit of fanciness is a 45 degree flare at the ends of the lid which allows the box to be unlidded easily without a pull. I have worked hard at learning to hand saw, the graceful flow of arm and wrist, the surrender of intention to the teeth of the blade. I take great encouragement from Chris Schwartz’ maxim “If you can see the line you can cut the line with a handsaw” … and yet, even at this early stage, my work started to go just a bit wrong. Not horribly, mind you, but enough that I needed to remind myself of my modest victory conditions.
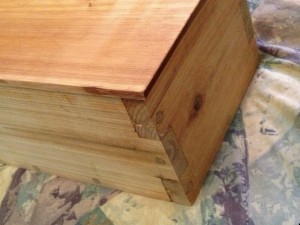
Again, lacking a proper wood working bench, I clamped the pin boards in my metal vice, once I’d padded the jaws. I marked and cut both boards at the same time, using cool tools from Lee Valley (their marking gauge and flush cutting dozuki saw.) I did my best, I swear, to transfer those marks to the other boards but again there was “slippage.” I cheated, I suppose, and cut the waste on the outer fingers but used a hand sharpened chisel to pare away the waste in the other boards. Again, it sure would have been easier with a proper work bench.
My one flat out mistake was to think that the bottom board would just magically fit. It does, more or less, but there is enough of a gap around one of the edges that a bit of black paint seeped out during finishing. Again it’s on the bottom and likely someplace I won’t notice at three feet away but if I make a similar box in future, I might fit the bottom to the sides with a rabbet. Dry fitting the pieces was a bit of an exercise in patience. The errors for the most part were corrected by shaving off a bit from the pins. There’s only one place where a glued in shim is cleverly assisting the joint.
Let me confess: I’m a sucker for doweled joints. There’s just something attractive to my eye about the little dot of end grain in the middle of a pin’s rectangle. I figured my little box could use all the support it could get. Here’s another confession. I believe I used the old-timey egg beater style drill to make the final hole but I used my battery-powered hand drill to make the pilot holes. Next time, I’ll use the electric for all the drilling. I cut off the dowels with the flush-cut dozuki and was a bit amazed as how much dowel the process took.
I trimmed and and futzed and sanded by hand and yes, at times, I wish I could have just smoothed away all the imperfections of my joinery using a massive belt sander. The surface feels good in the dark, smooth enough, even though it’s hardly pretty close up.
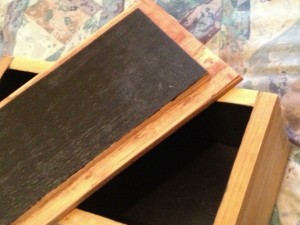
 The lid required another level of ingenuity. I toyed around with various ideas for a pull, discarding them all. I wanted a box I could slide under my bed so no knobs. I didn’t want to make finger holes because they’d let in dust and I’d seen pulls that were gorgeously hand carved into the very lid itself… but I couldn’t kid myself that my skills could pull off something that graceful, even using the three foot rule. I decided to flare the ends of the lid slightly at a 45 degree angle. The sides of the lid are flush with the box but the lid can easily be removed.
I ran into trouble making those dreams a reality. My fancy hand miter box wouldn’t accept the 8″ wide board so I improvised using an older chop saw while angling the board, not the blade. Despite my impromptu jig, the cuts worked more or less as intended. I’d never hand cut a rabbet before… but then I’d never hand cut finger joints either. I marked, muttered a prayer and did my best which turned out to be good enough. The chisel pared away the worst of my mistakes, mostly involving a remarkably poorly placed knot and a bit of hand sanding made things look almost sharp.
Finish was a bit of tinted sealer for the outside and a couple coats of flat black on the inside. I’m usually partial to orange shellac but I figured the abuse the box would likely endure might be too much for such a fragile, albeit easily fixed, top coat. I’ll rub in some paste wax at some point.
I am very pleased with my “three foot box.” It sits right beside my bed and is often the last thing I see at night. As Long as I keep it just a little farther away than arm’s reach, it’s a thing of pure delight. I learned a great deal building it, even beyond the skills I honed. I learned to love myself and accept my abilities as they are, even as I’m striving for improvement.
Posted in • Making.
rev="post-4132" 1 comment
– July 24, 2013
I took a class at Maker Works in Ann Arbor recently, and this patch was my take-home project. It wasn’t quite DIY (or do-it-myself) because I had a lot of instruction and assistance from Casey the workshop leader, but the 2 hour workshop certified me to use the Amaya Bravo 16-needle embroidery machine to work on my own designs whenever I want to schedule a block of time to work. It’s only a matter of time before I’m cranking out logo-ed swag for the 20 Minute Garden, the Daily Nightmare, Why Not Pie, and who knows what else.
20 Minute Jim was thrilled when Maker Works was launched in 2011. He’s written about Maker Works previously and has taken a couple of classes there too. For a while, he’s been nudging me to visit and check out the premises. So on June 11, when we were gathering freebies & deals around town to celebrate his birthday, we made a point to stop by the Maker Works building for a tour. We were in that neighborhood to pick up birthday deal coffee, cheese and bread (thanks, Zingermans!) I expected that we might get a 5 or 10 minute walk-through, but the desk staff person generously provided more than an hour of his attention and a wealth of information about the resources, policies, and procedures of the Maker Works studio.
The Maker Works space is bigger than I imagined it. It’s divided into five sections, and it’s stocked with high-end equipment available for use by members. Memberships are available for individuals, families, and businesses; there are discounts for students and veterans; and there’s also a day pass option. Maker Works also offers ways for members to earn credit toward membership in the form of doing tasks or jobs there. It’s a business but it’s modeled to be welcoming and inclusive.
We had heard one of the founders, Tom Root, speak at the Ann Arbor Maker Faire last month, and he mentioned the example of lawnmower ownership as part of the impetus for a place like Maker Works. We each have our own lawnmowers that we use for an hour or two every week or two, and meanwhile those lawnmowers take up space being stored in our garages. Maker Works takes as its premise the idea that tools are made to be shared.
And so is knowledge. One of the perks of going for a tour was a discount for class registration, and Jim double-dog dared me to register for something on the spot. I picked the embroidery machine class– because I know something about sewing, but the machine is a pretty complex big sibling to my little Singer. Casey packed a lot of information into the 2 hour workshop on the Amaya Bravo. Much of it came straight out of the SOP (Standard Operating Procedures) Manual that is prominently displayed at each tool workstation. When I realized I didn’t need to be taking notes, I was better able to concentrate on the wondrous workings of the Amaya.
I’m a product of the 1970’s public school system, so I grew up with the expectation that shop classes were part of the elective offerings available to all students. The overall trend in our schools, however, is away from electives, especially those hands-on, tech-type electives that teach skills rather than academics. It’s been sad to see those disappear from the educational landscape– and it’s another reason why place like Maker Works are even more valuable and important.
We all need opportunities to be creative and inventive. We need the tools and the skills to use them safely and properly too. We need the encouragement to try new things and learn. Maker Works provides all of the above for a reasonable fee, so I’m sure they will be seeing more of us in the future.
Posted in • Making.
Comments Off on Cool Patch! My first project at Maker Works
– June 22, 2013
Here is the serviceberry tree at the height of bloom.
That picture was taken on May 5th, and the blooms are now gone.
Still, it’s a lovely tree, very graceful and shady. I’m checking it every day for progress because, as previously noted, this year we’re getting the berries.
Posted in • Growing.
Comments Off on Serviceberry Tree in Bloom
– May 21, 2013