Inaugural Batch brewed on the $100 Dollar Folly
————
Posted on April 23, 2012 by halzpal
I *thought* I’d get a chance to brew on Easter weekend, though in retrospect I can’t imagine why. I even planned to be cute about it and whip up a clone of the Rogue Chocolate Stout. Get it? Chocolate Easter Bunnies? There’s a secret about this batch however that makes it relatively appropriate for Earth Day. The base recipe comes from the kind folks at Zymurgy, who publish the recipe in their “Best Beers in America” articles. This one came from the July/August 2009 issue (Volume 32. No. 4 pg 18) but I gather the same recipe also appeared in Zymurgy back in the September/October 2003.
————
Rogue Chocolate Stout Clone
5 U.S. gallons (19 liters)
O.G. 1.060 (15 P)
IBU: 69
11.0 lb. Great Western 2-row pale malt
.5 lb. 120L Crystal Malt
.5 lb. Chocolate Malt
.5 lb. Rolled Oats
3.0 oz. Roast Barley
1.5 oz. Chocolate extract (in secondary)
1.0 oz. Cascade pellet hops, 5% a.a. (90 mins)
1.0 oz. Cascade pellet hops, 5% a.a. (30 mins)
1.0 oz. Cascade pellet hops, 5% a.a. (knockout)
1.0 tsp. Irish moss (20 mins)
Wyeast 1764 Pacman Ale Yeast (If available) or White Labs WLP001 California Ale or Wyeast 1056 American Ale.
Mash at 150*F for 60 mins. Sparge at 175*F to collect 6.5 gallons of pre-boiled wort. Boil 90 minutes. Cool to 60*F and pitch yeast. Ferment at 60*F for one week. Siphon into secondary at 50-55*F onto chocolate extract and hold until fermentation is complete, then package and condition.
=====
I’m doing a couple variations:
• I cut the base grain in hopes of getting a slightly lower alcohol brew suitable for summer. I’m using about 9 pounds of Maris Otter. (Astute readers will note the grain substitution;)
• I’m not the greatest fan of Cascades, especially not in stout and the citrus-y “grapefruit” flavor in particular doesn’t sound like “chocolate.” And since I’m cheap, I’m using some pellet hops I had in cold storage: 1 oz. East Kent Goldings (5%), 1 oz. Ahtanum and 1 oz. Saaz.
• And for yeast I’m falling back on my favorite dry yeast — Safale S-04 “English Ale”
(Yes, yes, yes — I’m skewing the recipe away from American Stout into uncharted territory somewhere back across the Pond.)
• The one change to the recipe I think I •won’t• make is the chocolate extract in the secondary; that is, I *will* add some extract. I traditionally like to create the illusion of chocolate through other ingredients then a couple weeks back I mixed a bit of Creme de Cacao with the dregs of a Frankenstein Stout to marvelous effects. I’ve since encountered several mixed drinks on the menu at a couple bars that use beer in their mixology. It’s a strange world, ain’ it?
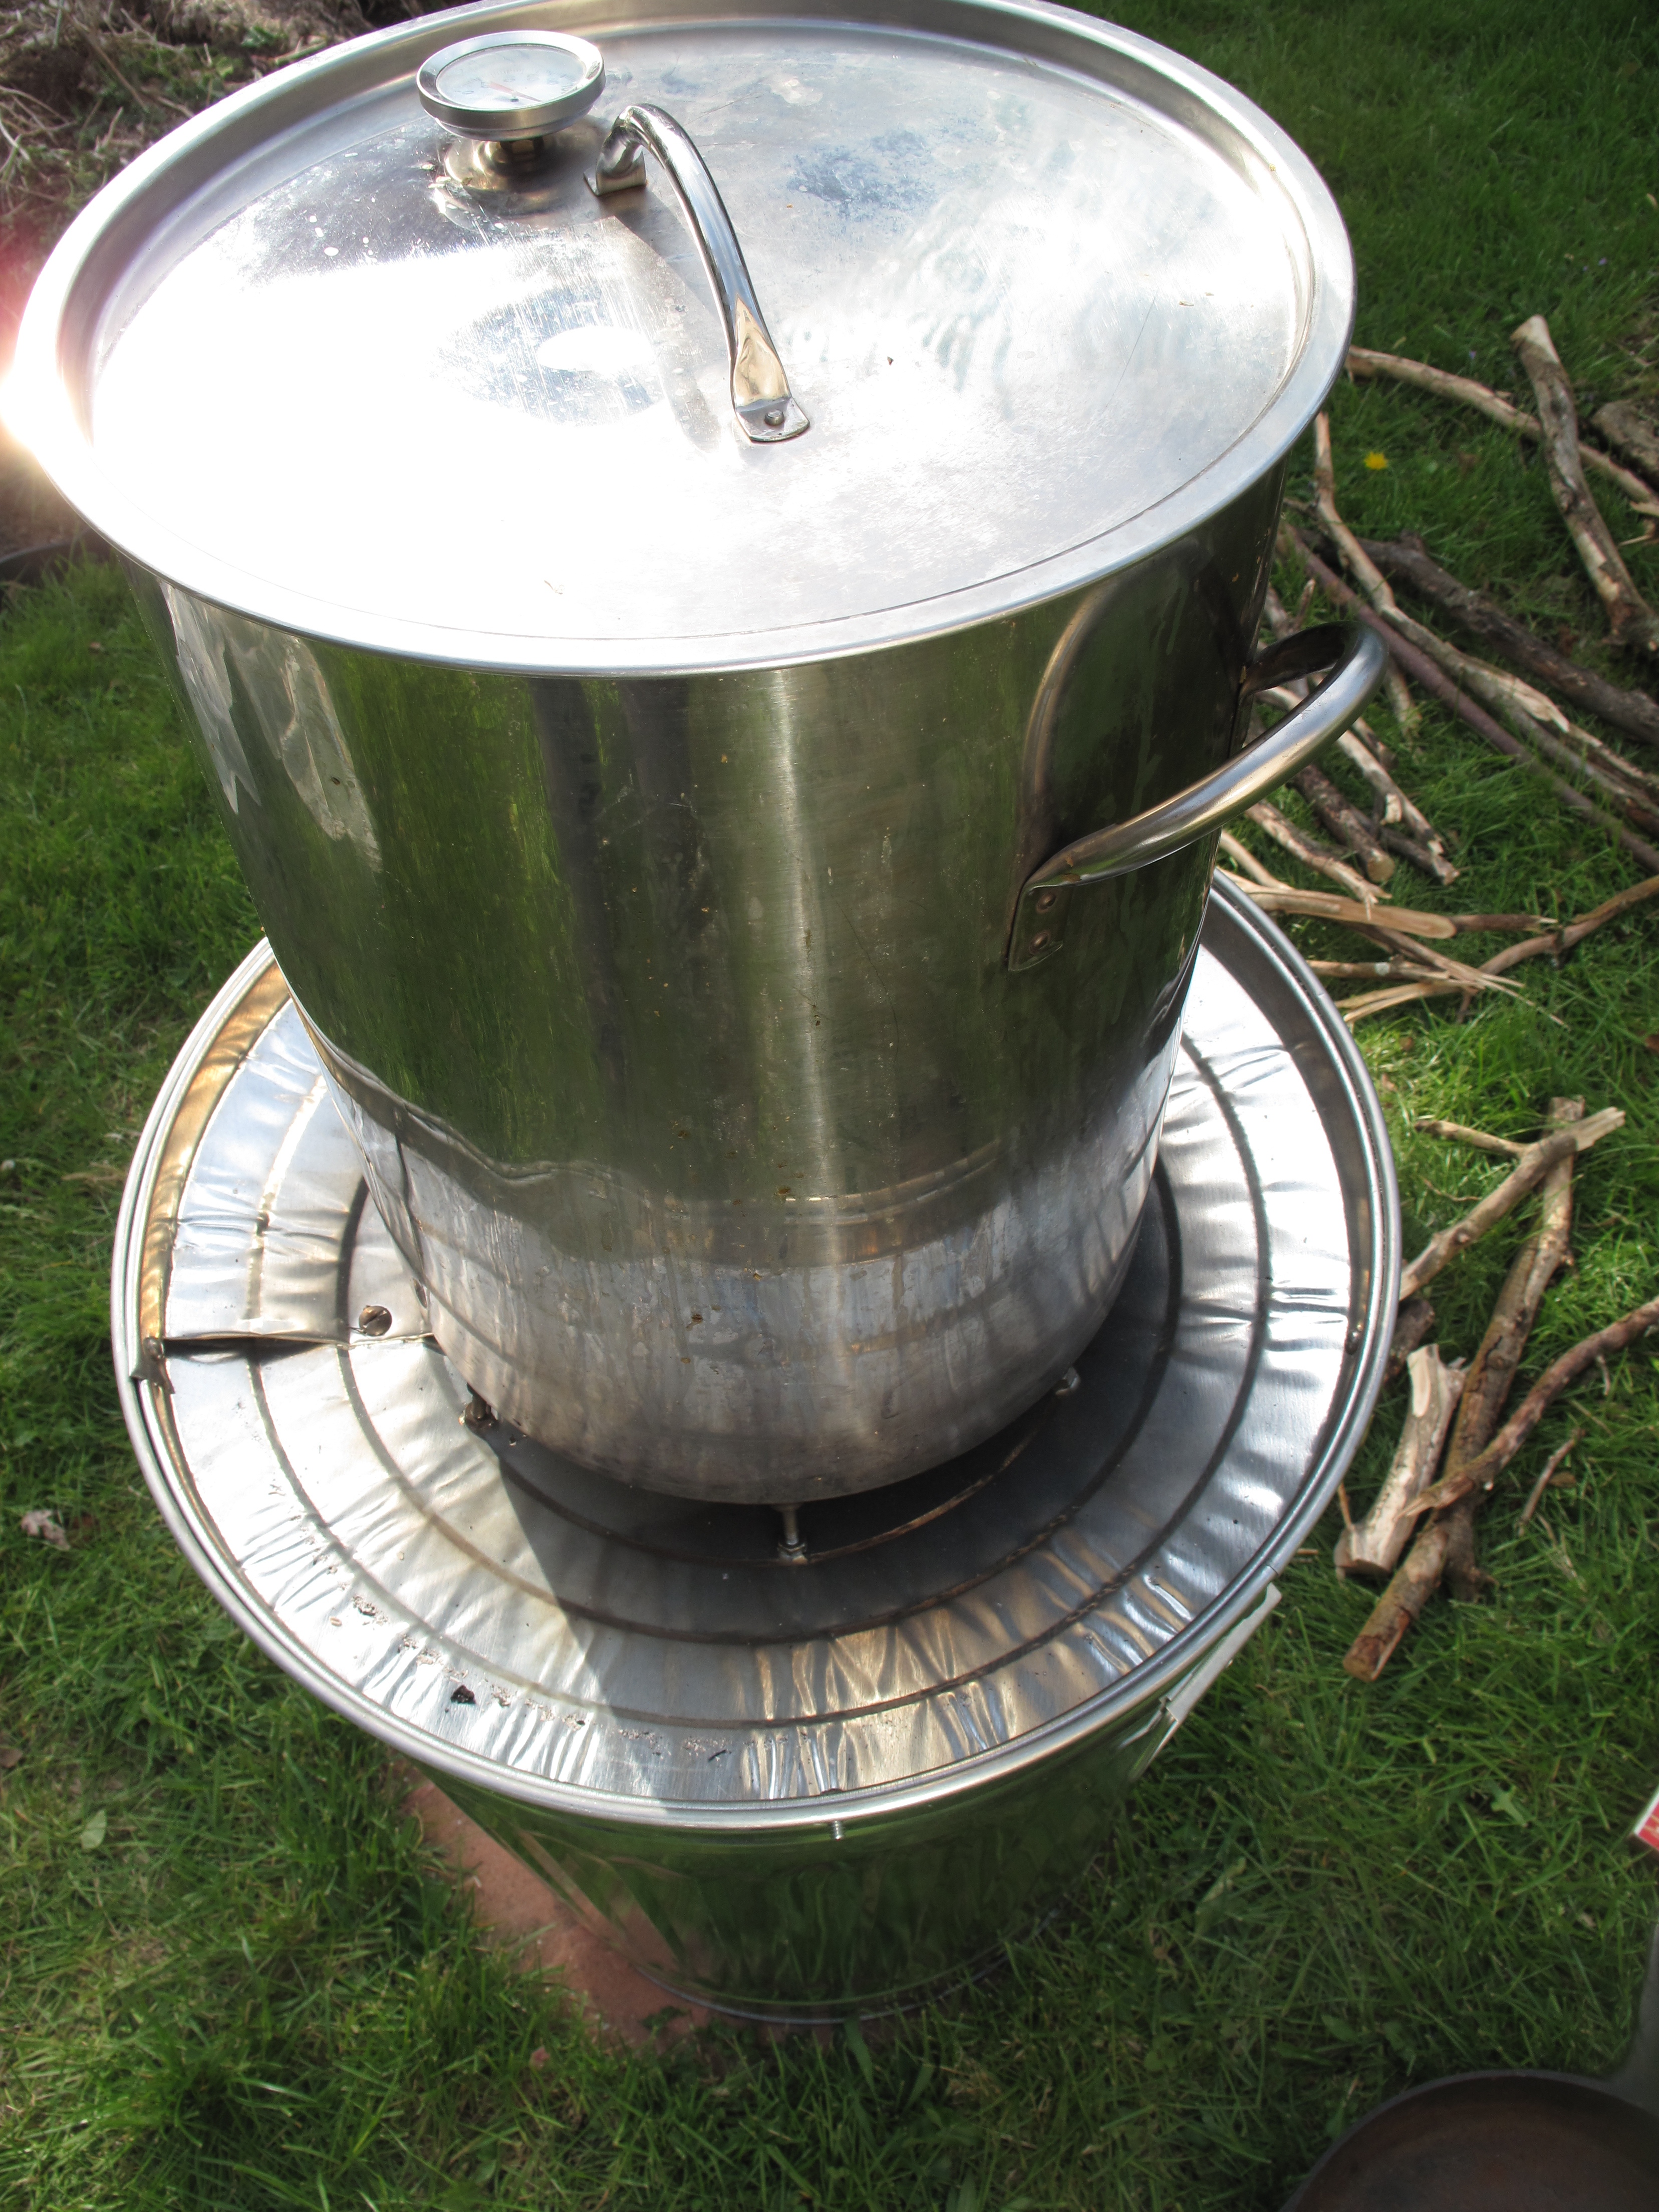
• I’m most excited about is that I brewed the batch on my brand new Rocket Stove code-named “The Hundred Dollar Folly.” I will have a post or two about construction of this marvel soon. I’m pretty pleased with how it turned out, especially since I’m not that skilled tinkering with metal.
View from the Brew: I had “trouble with conversion” which is a polite way of saying I took an overly long nap half-way through the process. I loaded up the cooler with grain and 7 gallons of 160 degree water which stabilized at 152… and I sat down to “do some research.” When I woke up, it was after 4:30, far later in the day than I’d hoped.
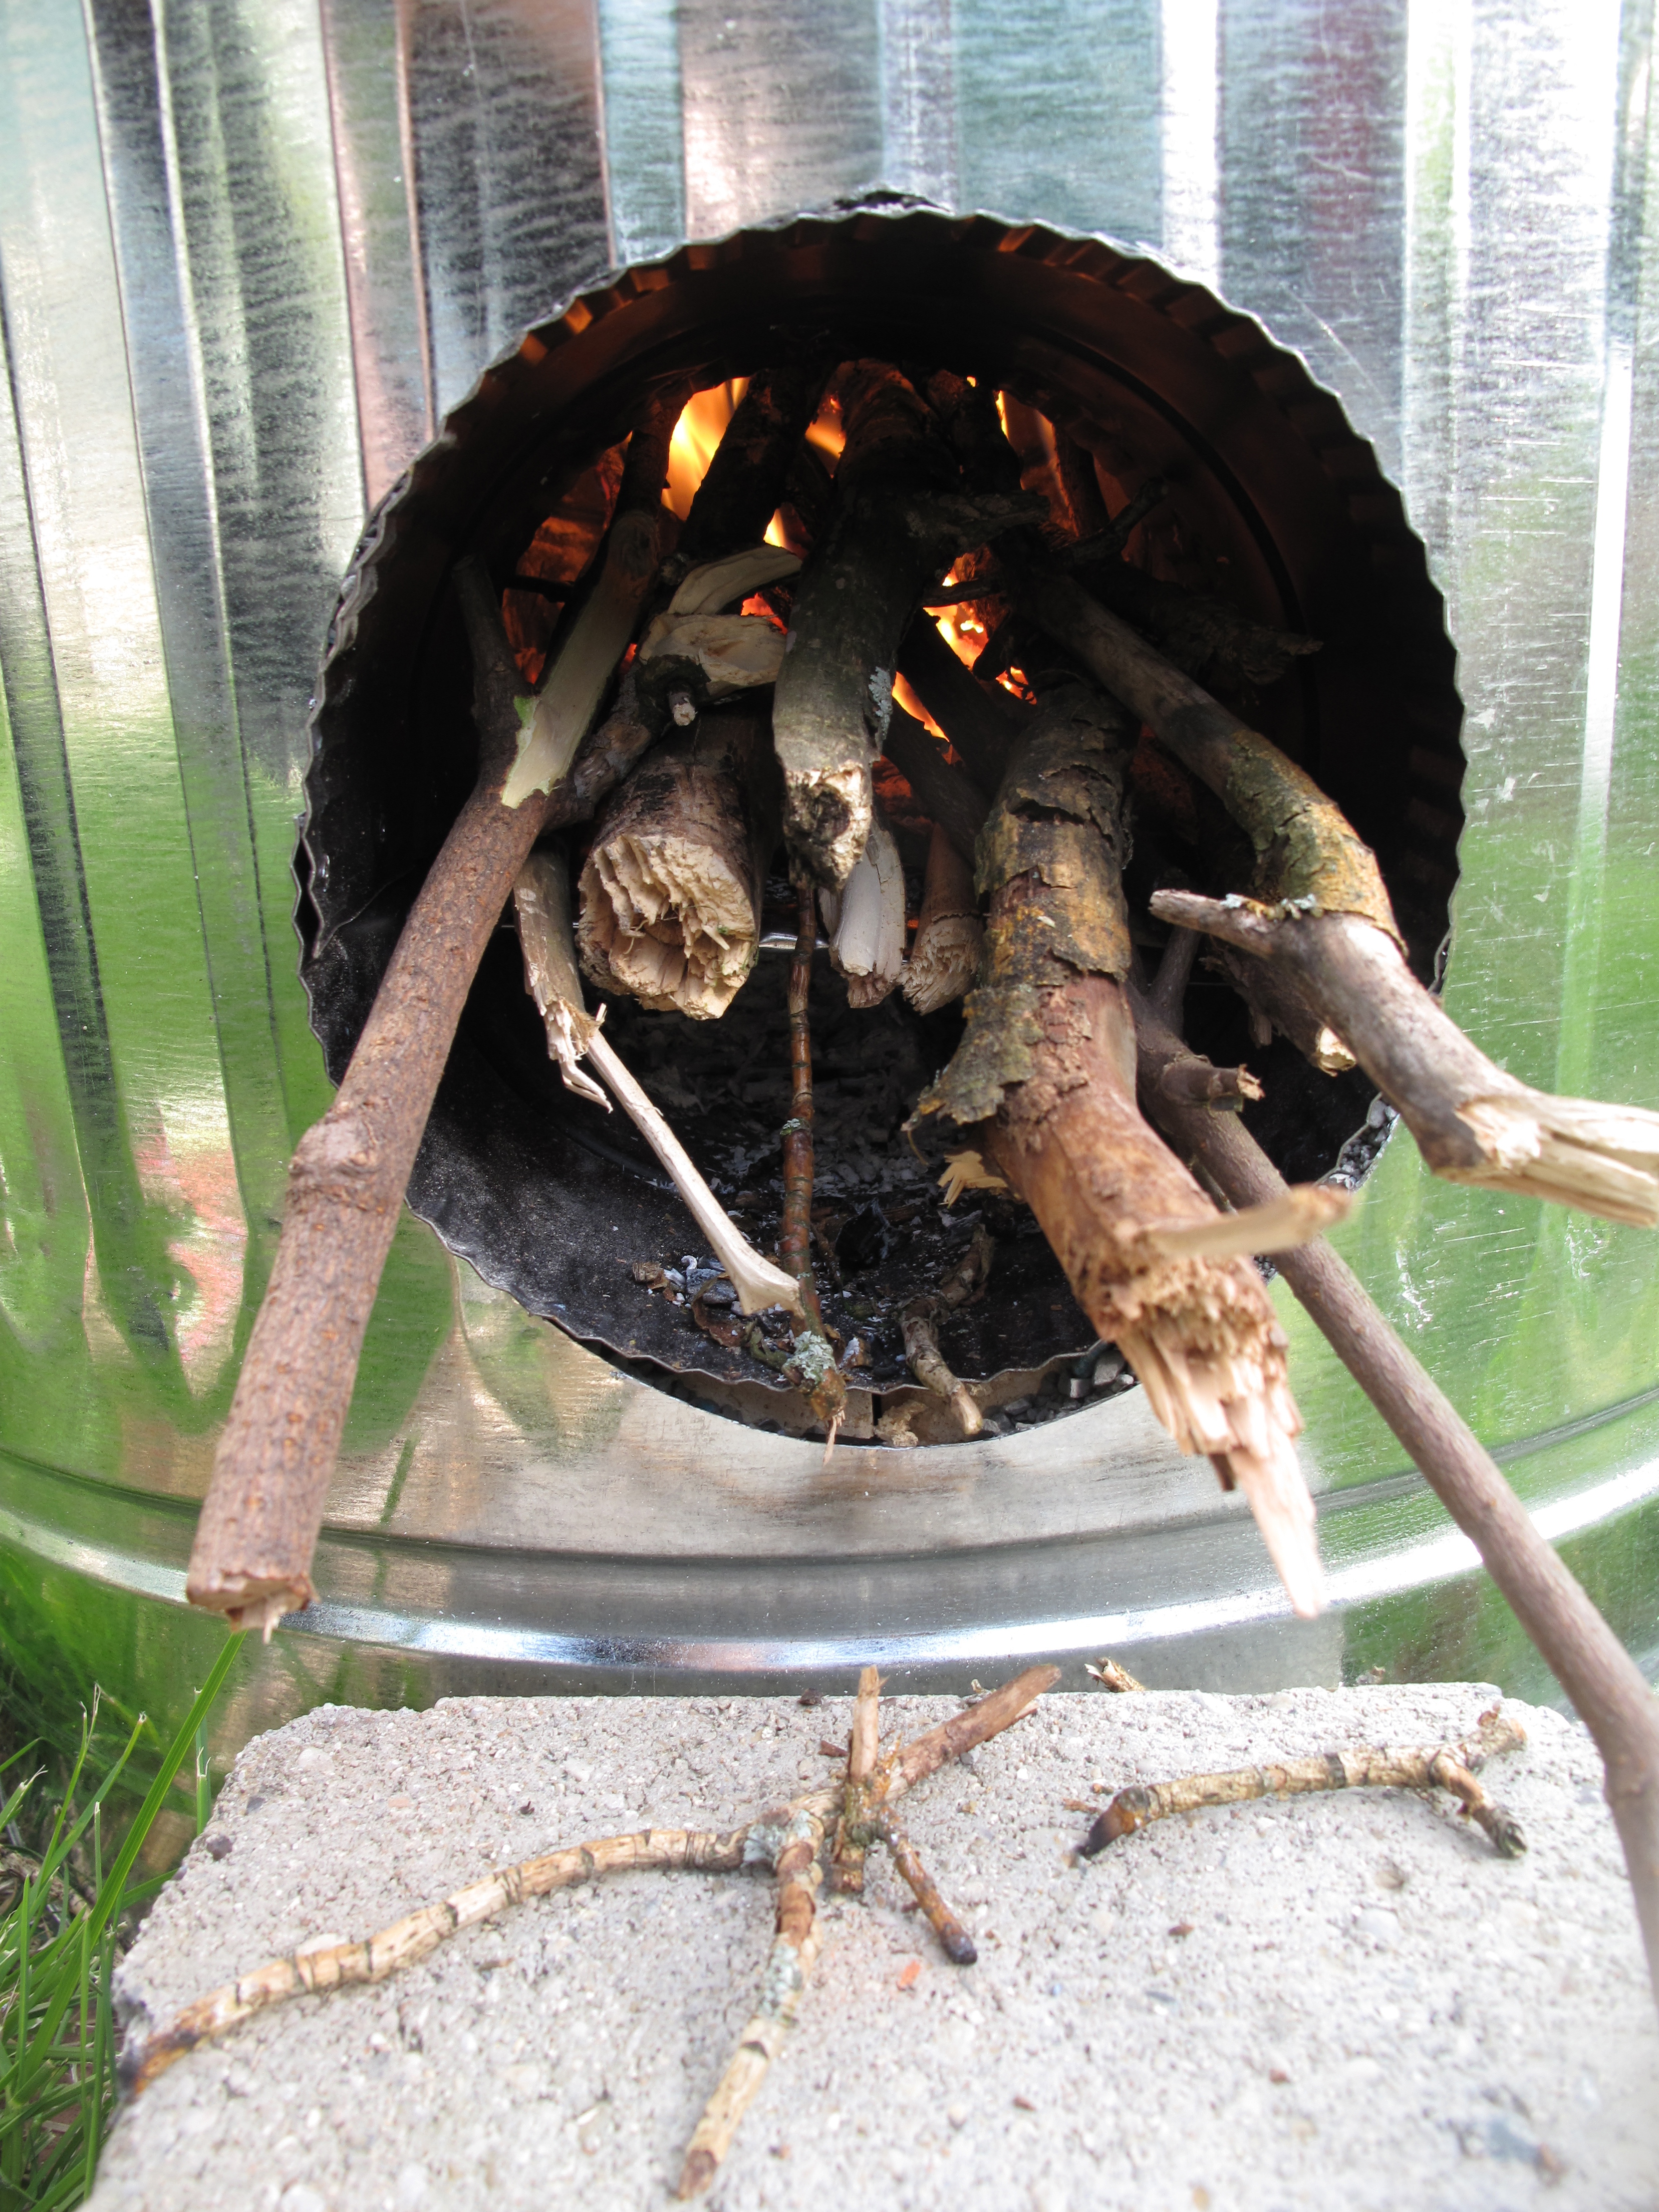
Lighting the rocket stove proved a bit less straight forward that I expected as well. The technique that finally worked for me was to crumple up a couple sheets of notebook paper, shove them DOWN the vertical flue and then to slide in the first load of twigs in the horizontal feed tube. The sticks weren’t particularly dry either but they caught after only a couple matches.
The draw on the stove really sounds like a rocket, by the way.
When I first put the 8 gallon stainless steel pot on top of the rocket stove, I was immediately engulfed in black smoke. Come to find out, the flue was a bit too close to the bottom of the pot so the flame was choked. A bit of handy work with tin snips and a wrench bent the extra length to a nice flared rosette. On with the boil!
The pot had about 5.5 gallons at around 145 degrees when I placed on the stove a little after 5:15 PM. It reached raging boil by 6:25 which is when I added the Ahtanum hops. At 6:45 I added the Kent Goldings and at 7:05 I added both the Saaz hops and put the chiller in to sterilize it. I removed the pot from the heat and started chilling. Next time, I won’t put the scalding hot brew pot on a patch of grass (D’oh!) and I’ll time completion to make use of that residual heat in the Rocket Stove. It would be plenty hot enough to do a stir fry or carmelize some onions. The other improvement I want is a “pot skirt” if for no other reason that to keep the wind from blowing back draft down the chimney. Half way through this boil, I improvised a sheild from a piece of scrap metal that I hastily bent. It seemed to improve the burn greatly.
Yeast was pitched and clean up complete by 8:10.
Observations and Notes for Improvements:
• Wood consumption — I didn’t believe the claims about how little wood a Rocket Stove used but I brewed a whole batch of beer with little more than the trimmings from one good sized bush. Next time I’ll photograph the wood I’m going to use, maybe even weigh it. Combustion was quite thorough with darned near no ash and no smoke, except for that one time when I nearly choked the flame. Smaller and straighter twigs seem to work a bit better than thicker ones (or is that rather obvious?).
• Tending — The Rocket Stove required nearly constant attention. Yes, I know this is a GOOD thing because it gives us brewers an excuse to sit in the back yard and look all serious and important while we’re basically doing what appears to be nothing. Seriously, since only the tips of the wood is on fire, every few minutes, each twig needs to be scooted in a bit. There are models of Rocket Stove that feature an angled fuel tube which allows fuel to be stoked for non-attended burns. My next Rocket Stove might be of that type but for now, I don’t mind a little fiddling.
• Soot — I wish I’d thought to photograph the soot on the bottom of the brew pot. It wasn’t as clean cooking on an electric stove but it wasn’t as filthy as I expected. The soot really was restricted to the very bottom of the pot. I’m curious how much was deposited due to my overly tall flue. I’m further curious if the pot skirt will help minimize the soot as well.
• Fuel tube divider — The most important part of a Rocket Stove fire, I learned, is the air. My tendency was to choke the flame with too much wood. As I pushed the wood in toward the combustion chamber, the divider that allows in air sometimes got pushed in as well, thus resulting in a rather oxygen starved fire. Further, the fuel tube divider itself didn’t seem strong enough to hold the weight of the fuel at least not at the temperatures of the fire. I’ll fiddle with that before the next burn.
• Insulation — At the end of the burn, the outside of the utility pail was warm to the touch, not hot by any means but about as warm as a cup of coffee with milk. I don’t believe that’s hot enough for the zinc to vaporize… then again it’s a bit warmer than I was lead to believe based on the guy who built a Rocket Stove in a cardboard box. The cat litter didn’t give off any objectionable odor though it did keep pouring out between the fuel tube and the hole I carefully cut in the pail. I’m tempted to weld it.
I am extremely pleased with this inaugural burn of my “Hundred Dollar Folly” Rocket Stove — though the real proof will be when it comes time to sample the stout. Fuel was free and *very* local since it came from the bush at the end of my drive.


